> ## Documentation Index
> Fetch the complete documentation index at: https://celo-64ac69bd-palango-docs-restructure.mintlify.site/llms.txt
> Use this file to discover all available pages before exploring further.
# Set up a Ledger Wallet with Celo
How to set up a [Ledger](https://www.ledger.com/) Nano S or X hardware wallet.
***
## Hardware Security Module
A hardware wallet or Hardware Security Module (HSM) holds a single random seed (expressed as a mnemonic) which can be used to generate any number of public-private keypairs, that is, any number of accounts ("wallets"), each with an associated address.
The steps below require technical knowledge. You should be comfortable with the Command Line Interface (CLI) and understand the basics of how cryptographic network accounts work.
## Requirements
Make sure to have the following before you begin:
* Initialized your [Ledger Nano X or S](https://support.ledger.com/hc/en-us/articles/360018784134)
* The [latest firmware](https://support.ledger.com/hc/en-us/articles/360013349800) is installed
* [Ledger Wallet](https://www.ledger.com/ledger-live) is ready to be used.
## Installation Instructions
### Install the Celo Application
Start by installing the Celo application and setting a PIN on your Ledger device by following steps 1 and 2 [on this page](https://www.ledger.com/start/).
Make sure to securely back up both the PIN and the recovery phrase (also known as a backup key or mnemonic). If you lose them, or they are stolen, you lose access to your Celo assets with no recovery possible. The recovery phrase will be shown only once.
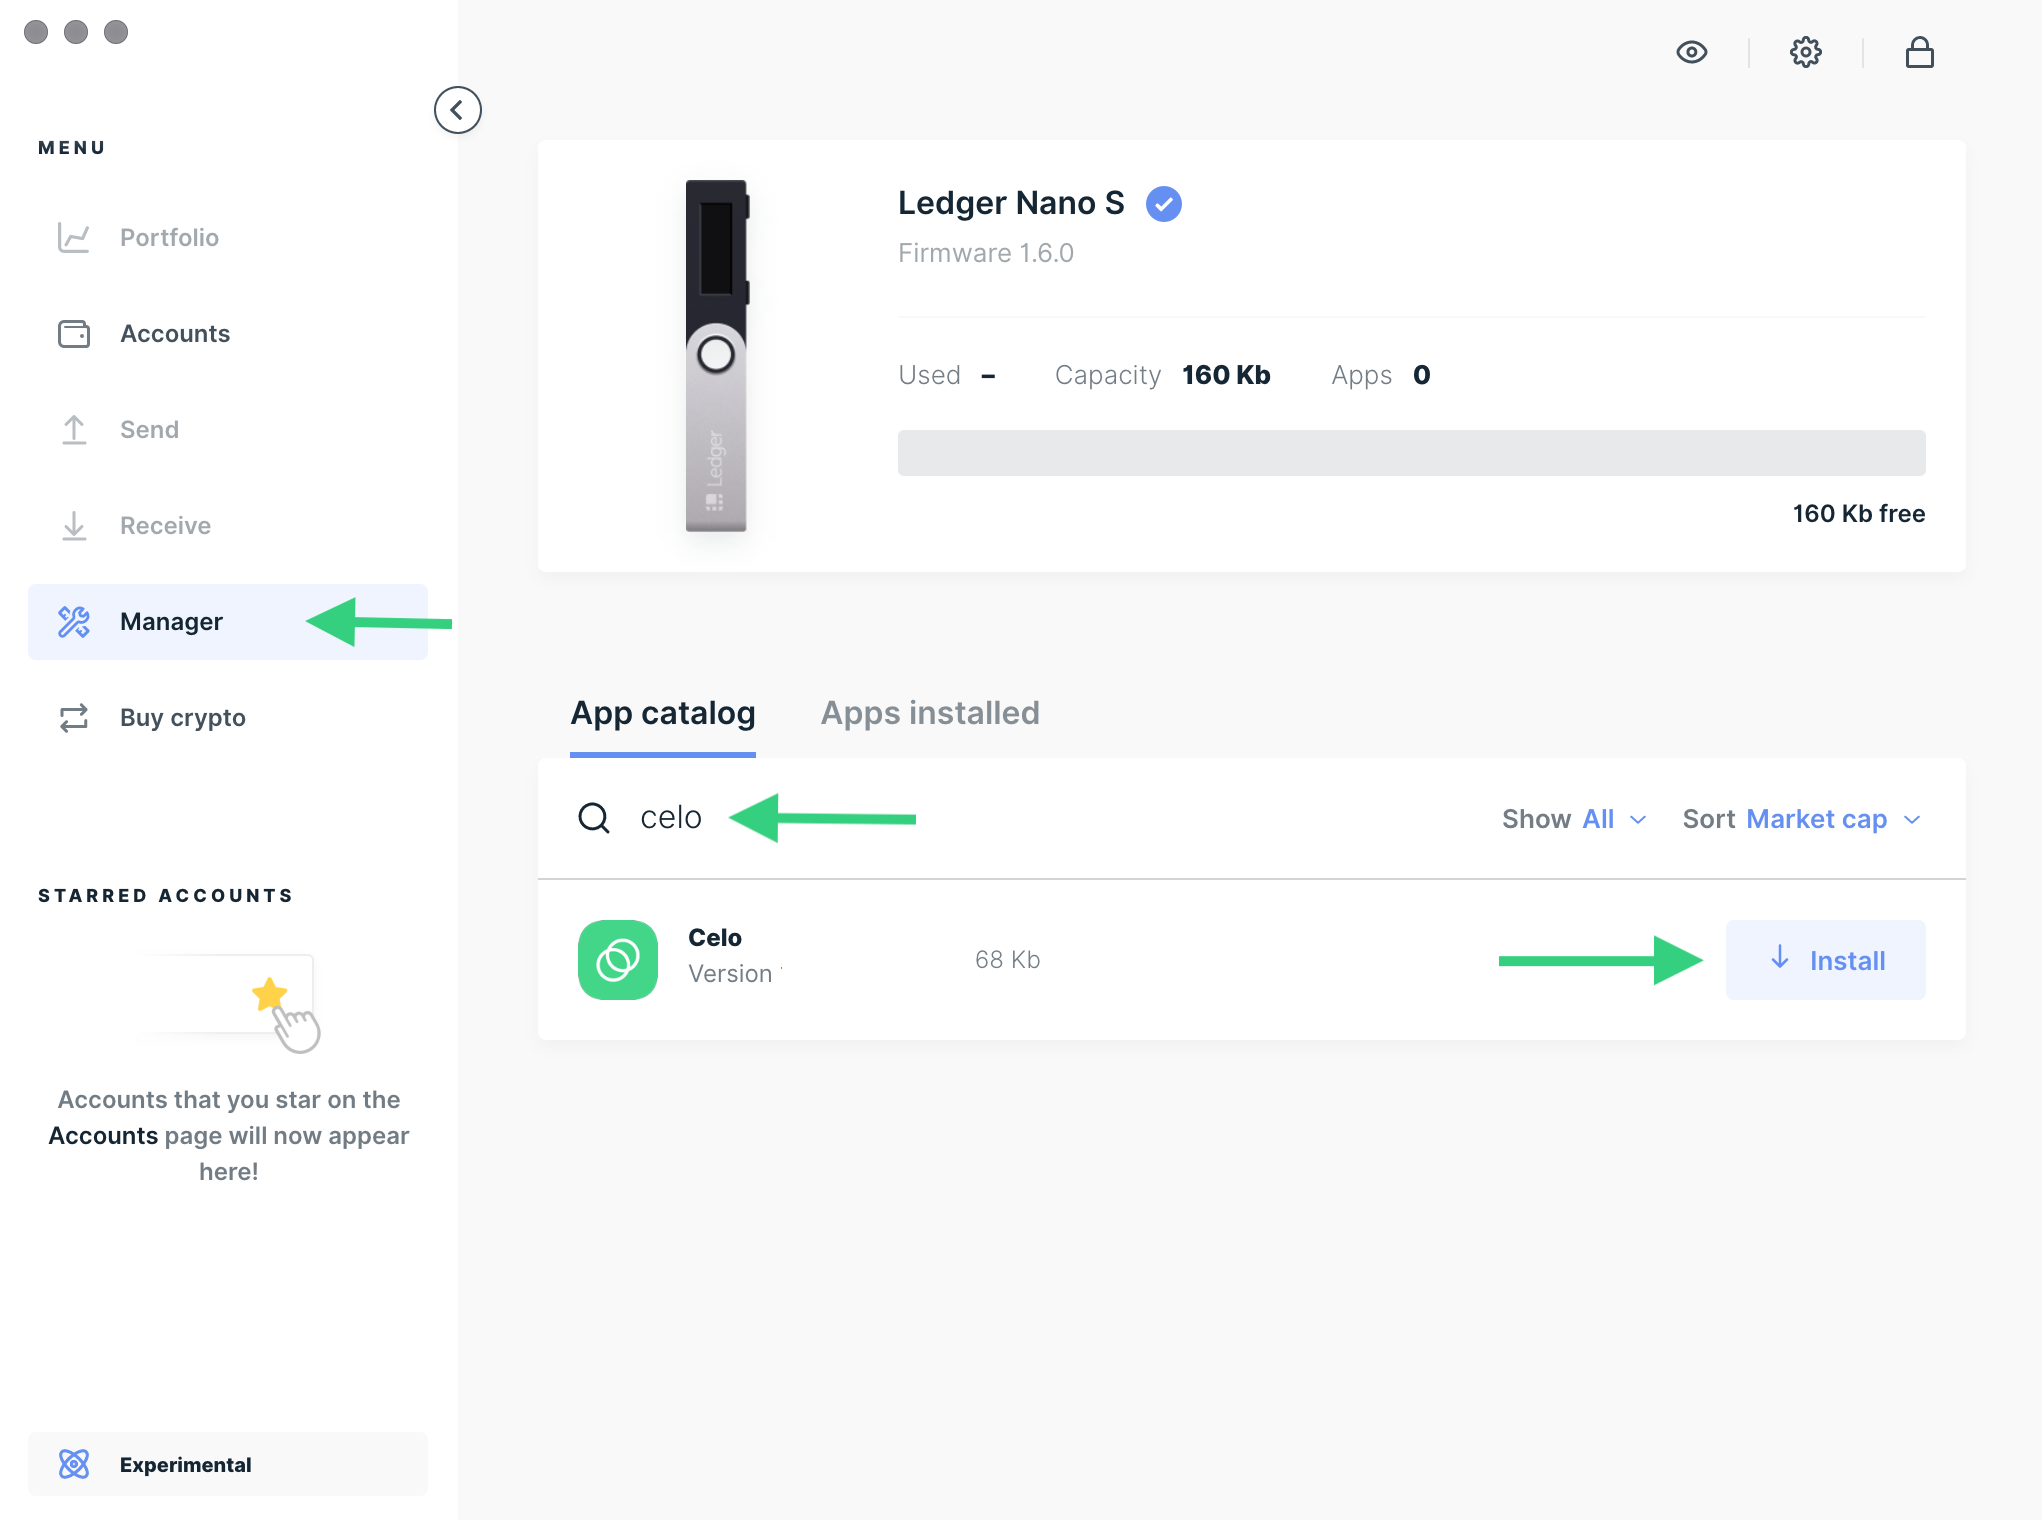
Open the Ledger Wallet App on your computer and follow the instructions on the screen.
Search for “Celo” in the app store.
Click **Install** for the Celo app, this will install the Celo App Version 1.0.3 on your device.
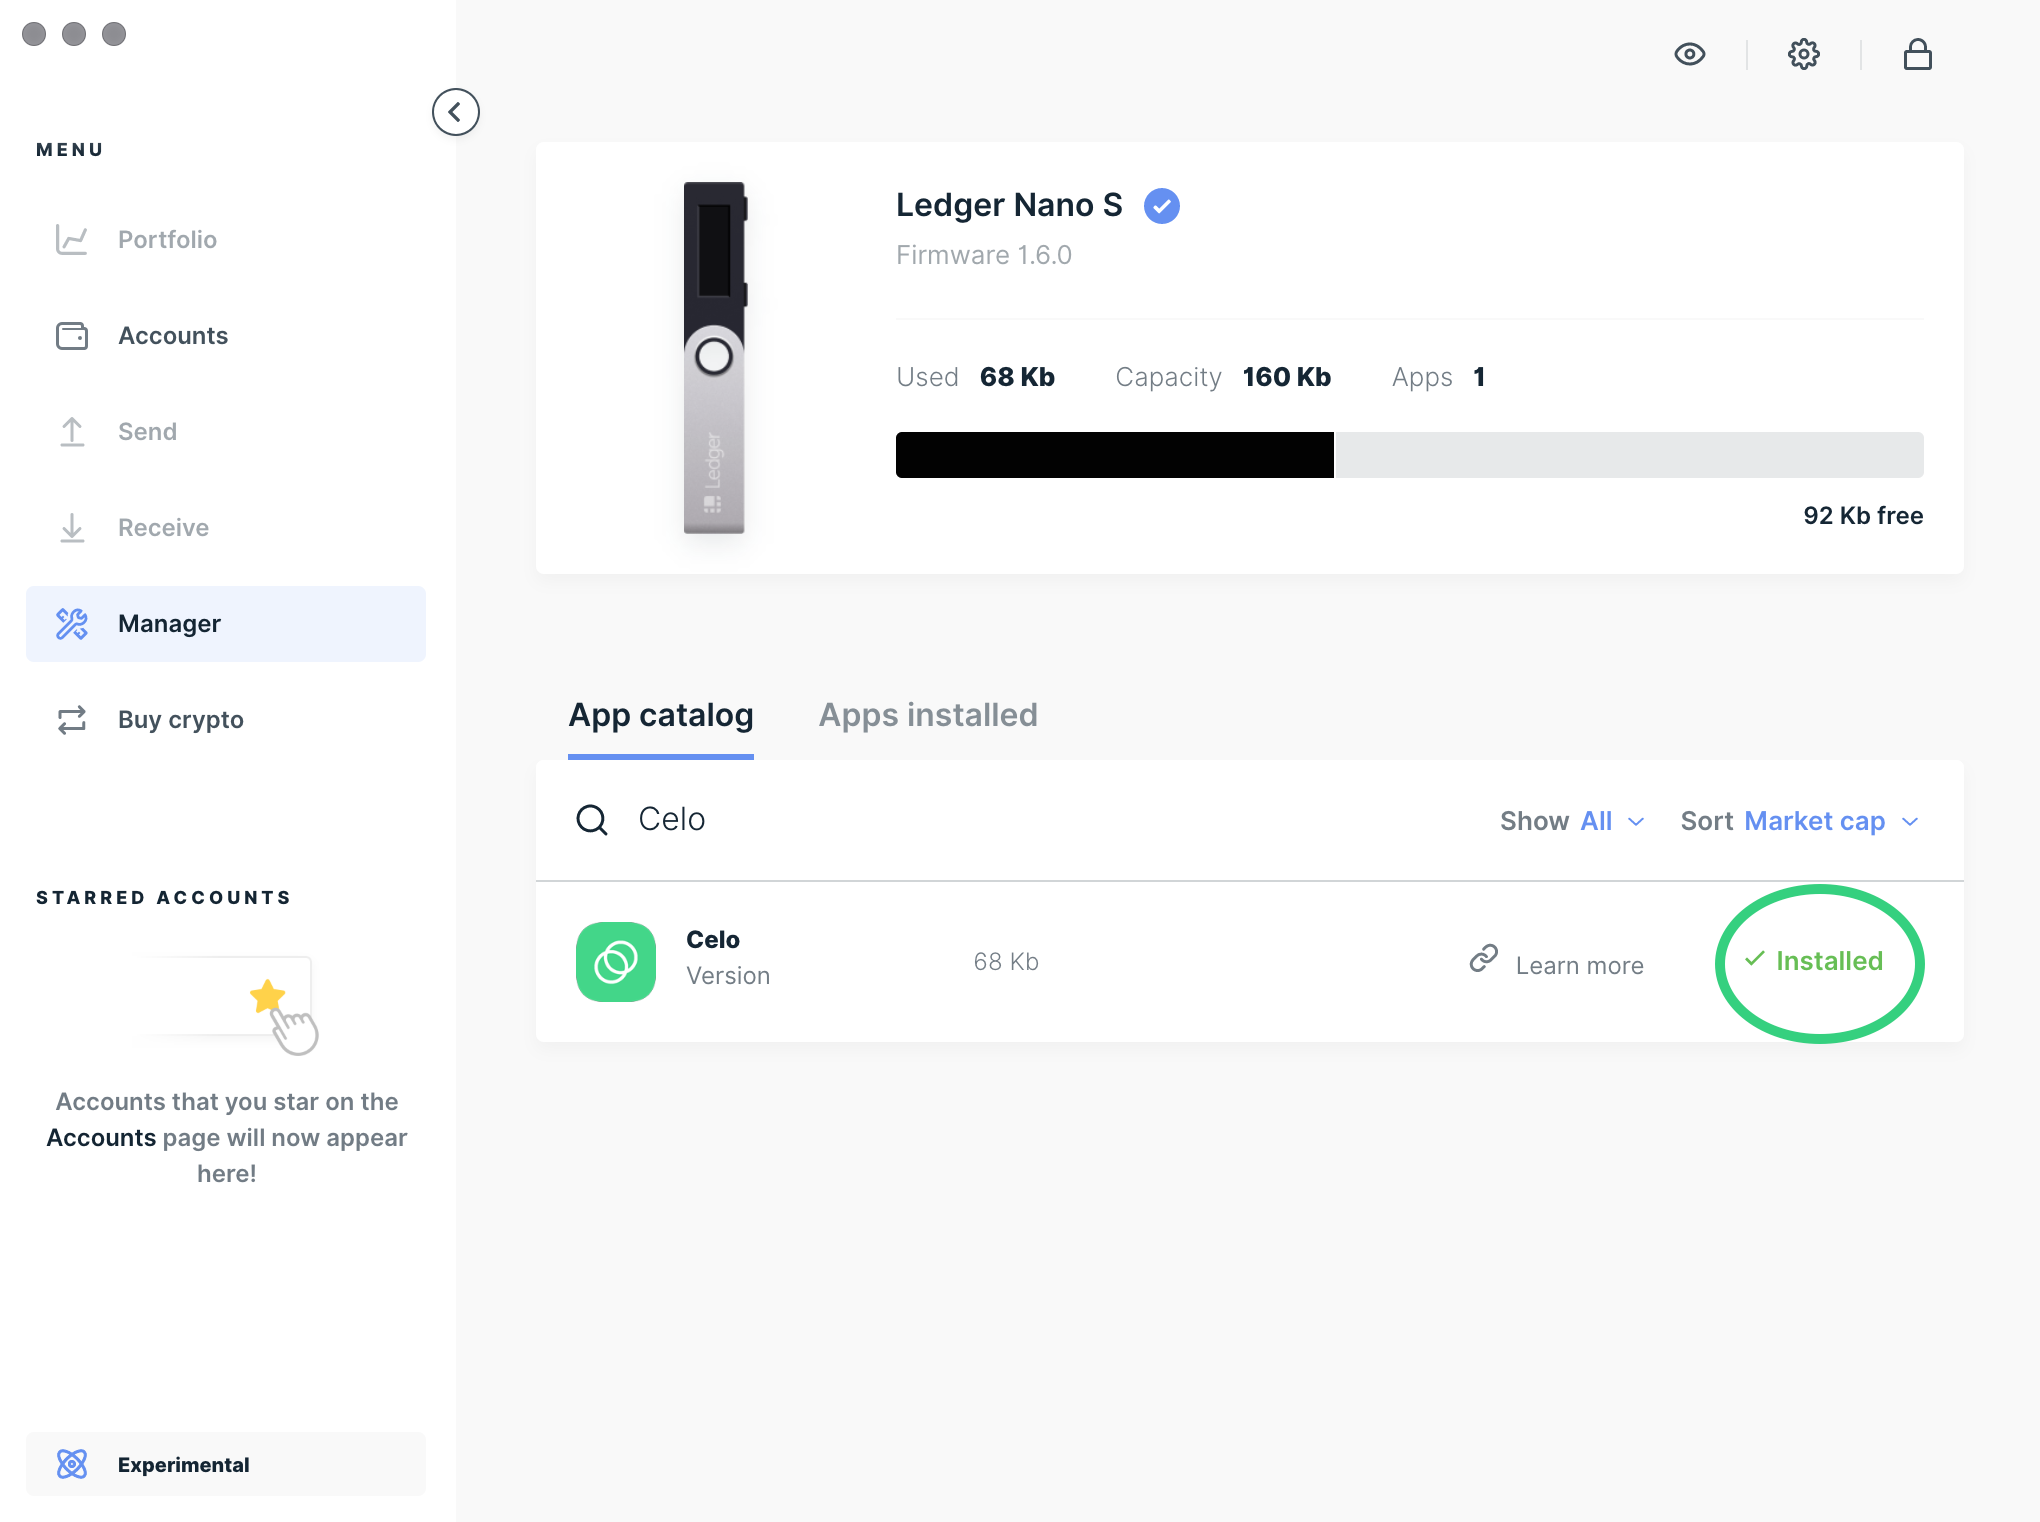
If you’ve previously installed the Celo app on your device, you’ll see an **Upgrade** option instead of **Install.**
The installation is completed once you see the green tick and **Installed** label.
You should now see on your device’s screen `Celo app`. You may need to toggle left or right using the buttons on the device to find the app.
Quit the Ledger Wallet app on your compute but keep the Ledger wallet connected to your computer.
### Setting up the Celo app
On your Ledger Nano device enter the PIN if prompted and press both buttons at the same time to open into the `Celo app`.
Press both buttons on the device at the same time to continue.
The Celo app is now ready for use and you should see `Application is ready` on the screen.
#### Connect your Leger to Celo applications
* [Celo Terminal App](/wallet/ledger/to-celo-terminal)
* [Celo Web Wallet](/wallet/ledger/to-celo-web)
* [Celo CLI](/wallet/ledger/to-celo-cli)
## Known Limitations
The Celo Ledger app currently does not support signing EIP-712 typed data, which is required for certain operations like signing Safe multisig transactions via WalletConnect.
If you need to sign EIP-712 transactions, you'll need to use the **Eth Recovery app** as a workaround. See the [EIP-712 Signing Workaround guide](/wallet/ledger/eip712-workaround) for detailed instructions.